
Quality Printing
Services

Fast Turnaround
Time

Next Day
Delivery Available

Green Credentials
Carbon Smart
If you use only the fonts that came with Microsoft Office, ie Word, PowerPoint or Publisher, then no. We have them here too.
But if you use any other fonts from other sources then we do need you to gather up copies of them and archive them together using a program like Winzip and send them to us with your layout file.
If you don’t know how to do this then just carefully go through your document and make a list of the fonts used. Send that list to us in an email along with your order reference number so that we can find good substitutes for your typefaces.
If you are not sure that your file will work, you can send it to us and we will examine it to see if there are any major flaws that would prevent us from printing your job.
We will send you a PDF to check and approve, prior to production.
Whilst we have made appropriate suggestions on each of our products, here is further guidance:
A Series
A0: 1189mm x 841mm
A1: 841mm x 594mm
A2: 594mm x 420mm
A3: 420mm x 297mm
A4: 297mm x 210mm
A5: 210mm x 148mm
A6: 148mm x 105mm
A7: 105mm x 74mm
RA Series
RA1: 860mm x 610mm
RA2: 610mm x 430mm
RA3: 430mm x 305mm
SRA Series
SRA1: 900mm x 640mm
SRA2: 640mm x 450mm
SRA3: 450mm x 320mm
B Series
B1: 1020mm x 720mm
B2: 720mm x 520mm
B3: 520mm x 360mm
Other
Royal: 640mm x 520mm
Postal: 730mm x 570mm
MO: 650mm x 480mm
6ppA4: 640mm x 340mm
12ppA4: 650mm x 640mm
Quad Crown: 1020mm x 760mm
Double Crown: 760mm x 510mm
Bleed – how to create it and what it does
Commercial printing presses have one major thing in common with your standard desktop printer – they cannot print to the very edge of a sheet of paper. However we get around this easily by printing onto much bigger sheets and then trimming down to size.
As paper passes through a printer it moves slightly, I mean slightly – mostly no more than 2mm – so not every image is printed in exactly the same place on all sheets. As we trim the sheets in large stacks, trying to cut dead on the edge of your image is almost impossible, to get around this issue we have 3mm of bleed on all edges of the image, this is just an extension of the background image or colour. This allows us to trim slightly into the image, meaning no white edges for you.
Whilst creating bleed is incredibly useful designers are generally also very careful not to put anything important such as text or logo’s too close to the edge. We generally ask for a 5-10mm margin inside the cut line, not only does the finished product look better with space around the edges but it makes it almost impossible to cut anything important off.
When we talk about “print-ready artwork”, we literally mean ‘artwork that is ready to print’. These are files which don’t require any additional tweaks or design before we can print from them.
If you are supplying your artwork print ready it should be:
Set to the correct dimensions for the item that is being printed, including any bleed area
CMYK colour format / or set up with Spot colours
High resolution (in printing, this means 300dpi at full size)
Include bleed (this is the extra bit of artwork which covers the cut line. Without it there would be a risk of some white showing at the edges, for most items 3mm on each edge is sufficient.
Live text converted to outlines (as the text could change when opened on our computers, if we don’t have the same fonts as you)
Checked thoroughly by you for errors in the spelling and grammar, incorrect information, or problems with the layout
Ideally supplied in the following formats: PDF or JPG with minimum compression
We’ll always check your files are suitable before we send them to print, we’ll also give them a once over for any errors – just in case!
If you’re files aren’t quite print ready or you’d rather not worry about any of the above feel free to give our design team a call. They can help you tweak things or take a brief and create print ready artwork for you.
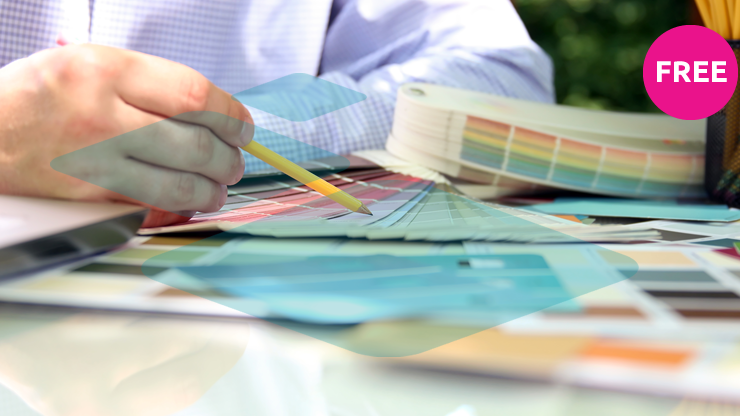
Paper selection is an important element in print projects. Selecting a Substrate can often be very confusing; there are numerous different types and brands of paper available today. When selecting Substrate, be sure to keep in mind that the choice you make for your project will affect how the printed piece is perceived. Before placing a printing order, it is a good idea to request a paper sample for each Substrate you are considering for the project.
Finish: The finish of a paper/Substrate is its surface texture. Uncoated and coated paper has different surface textures.
Wove or Smooth: A smooth uncoated surface.
Laid: A paper that is manufactured with textured lines on its surface. This finish is used mostly for business stationery elements, like letterhead, envelopes and business cards.
Linen: Similar to a laid finish, this Substrate has textured lines on the surface of the sheet, but they are finer and more regular than those that appear on a laid finish stock. This paper is also used frequently for business stationery.
Laser: A paper that is guaranteed to be compatible with laser printers.
Coated: A paper with a waxy finish (shiny or matte).
Uncoated: A Substrate with an untreated surface that is dull and unreflective.
Coated One Side (C1S): A cover stock that has a coating on one side and is dull on the reverse side.
Coated Two Sides (C2S): A cover stock that has a coating on both sides.
Weight: The weight of a Substrate refers to its thickness and is measured in grams (gsm). The higher the number, the more (equivalent) weight a paper has (the thicker/heavier the Substrate).
Opacity: A paper’s opacity is determined by its weight, ingredients and absorbency. A paper’s opacity determines how much printing will show through on the reverse side of a sheet. Opacity is expressed in terms of it’s percentage of reflection. Complete opacity is 100% and complete transparency is 0%.
Brightness: The brightness of a sheet of Substrate measures the percentage of a wavelength of blue light it reflects. The brightness of a piece of Substrate is typically expressed on a scale of 1 to 100 with 100 being the brightest. Most papers reflect 60-90% of light. The brightness of a Substrate affects readability, the perception of ink colour and the contrast between light and dark hues.
Our sample packs provide a small sample of EVERY product we offer, including all the different finishes for each product, so if you are still a little unsure of which material you would prefer, simply enter your details and we’ll get one sent to you as soon as we can.
Please mention in the comments box if there is a specific material you would like to test drive so we can ensure that you definitely receive it!


